Loading... 167 view(s)
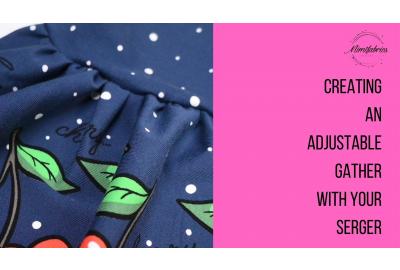
Gathering fabric on a serger sewing machine
If you love all things peplum and ruffles then chances are that you are doing tons of gathering in your sewing endeavours.
While there are many different ways to achieve a beautifully spaced ruffle or gather, the serger method is my absolute favorite one.
In the video instructions we have used the Baby Lock Victory serger and Madeira Serger threads but any serger machine can do this!
It's fast, it's easy and it looks amazing.
Here are some examples of what you can do with this technique.


Keep on reading for the 5 easy steps to complete this sewing technique, keep scrolling to get to the video tutorial :)
1. Set up your serger for single needle serging
For this technique only one needle is required in your serger.
You can technically remove either one but I like to remove my right needle and keep the left for the simple reason that the loops on my looper, blade position and all other adjustments can remain the same.
So no adjustments of the other knobs and wheels required, just take out your right needle and thread and you are good to go.
Of course you still need to thread the remaining needle and the loopers before you start sewing.
TIP: If you use a different color for your needle thread than the looper threads step #3 will be much easier.
2. Serge along the edge of the piece you want to gather
Start off with a serged thread tail of about 10cm (4 inches) then add your fabric and serge along the whole edge you are about to gather.
Keep the fabric a single layer and your edge close to the serger blade. When you reach the end of your piece keep serging for about another 10cm.
3. Locate your needle thread and start adjusting
If you have chosen a bright color of thread for your needle this step will be easy!
Now grab that thread on either side of your piece, push back the looper threads towards the fabric and gently start pulling the needle thread.
Every few cm push the gathers you have made towards the center of your fabric.
You can alternate between both sides to create an even gather.
4. Adjust your gather
To make your project perfect you now need to adjust your gathered piece to be the same width as the piece you are attaching it to.
If your gather is too tight, simply stretch the sides of the fabric out to reduce te gathering.
If the gather is still to loose, keep pulling the needle thread and pushing the looper threads towards the center.
Evenly disperse your gathers along the edge.
5. Complete Construction
Now it's time to pull out your favorite pins or fabric clips to secure your pieces and make sure your gather stays in place.
Pop your right needle back into your machine and thread it.
Serge both pieces together like you would for any other construction "et voilà" you have secured and completed your gather!
Now keep making more ruffles :)
Here are some great projects you can try in case you need some inspiration.
HELMI DRESS AND SKIRT BY ELVELYCKAN
Don't forget to like and subscribe our You Tube channel !!!